
Introduction
A bookmark is a TIBCO Spotfire feature used to store the state of an analysis as a snapshot. For example, add a bookmark to your analysis would allow you to return to a state where you found something interesting when you marked or filtered out certain items.
A bookmark can be applied at any time, allowing you to quickly return to a previously created view of the data. You can also share your insights with others by making your bookmarks available to other users, or by sending links to the bookmarks.
By default, a bookmark saves the state of the following items:
- Page Layout and Visualizations – captures the layout and the setup of the visualizations on the active page. This includes all specified visualization properties. For example, selections on the axes of a visualization, coloring, formatting, and which visualization features are shown or hidden
- Active Page – captures which page is active when the bookmark is captured
- Active Visualization – captures which visualization is active when the bookmark is captured
- Filter Settings – captures the filtering and filter types used in the analysis
- Filter Organization – captures the layout of the filters panel (sort order, filter groups, hidden filters)
- Markings – captures which items are marked in the visualizations in the bookmark. Note that the active marking for a visualization is included in the Page Layout and Visualizations bookmark part
- Properties – captures any editable document, data table, and column properties used on the active page, as well as any property values referred to in a property control
Note: the “Add Bookmark Special” dialog allows you to select only the bookmark settings which should be included in the bookmark.
Problem Statement
In one of our projects, we have noticed that the standard bookmark functionality in TIBCO Spotfire is having some constraints when the bookmarks are created in the TIBCO Spotfire Web Player.
The TIBCO Spotfire Web Player does not allow you to create a new bookmark through the “Bookmark Special” dialog and thus all bookmark settings are taken into account during the creation.
This might cause a conflict when a bookmark has been created on existing visualizations while the visualization properties have been changed over time. Note: there will be not any impact when a new visualization is added to the analysis after the creation of the bookmark.
A practical example, you’ve created a bookmark on a table visualization and afterwards you want to change some attributes on the visualization such as applying a coloring section, add a new column, remove a column, .. So far so good but the problem comes into the picture when you want to apply one of the existing bookmarks.
You will notice that this will cause a conflict because the new enhancements on your table visualization will get lost by applying the bookmark which was created earlier. The impact resides on the “Page Layout and Visualizations” setting which will reflect the original state of the visualization.
Implementation
In the following paragraphs, we will explain how you can implement a workaround to avoid this behavior. The magic begins by building our own bookmark button to create new bookmarks in our analysis. The standard bookmark popup menu in TIBCO Spotfire can still be used to apply and verify existing bookmarks in the analysis.
Behind the scenes, we will make use of our logic written with JavaScript and IronPython. Our implementation will only include the following bookmark settings:
- Active Page
- Active Visualization
- Filter Settings
- Filter Organization
- Markings
- Properties
As you’ve noticed in the above selection, we don’t include the setting “Page Layout and Visualizations”.
More information about the bookmark configuration options can be found in the TIBCO documentation. Note: the member name are referenced in the IronPython script to define which settings should be enabled/disabled.
Step 1: Insert a text area and add a HTML table which includes the following components:
- an input box, property name “vCreateBookmarkName”
- a document property label, property name “vBookmarkCreated”
- a button, with the button name ‘Create Bookmark’
The Spotfire elements are being encapsulated between HTML spans. We’re using this approach in order to reference these elements by the JavaScript function. A title and a description are optional and it will provide the end users some context on the usage of the above elements.

Step 2: The base elements are now available to implement the magic logic so let’s get started with the IronPython script. The script will determine which bookmark settings will be taken into account during the creation of the bookmark. This script will be executed by clicking on the button “Create Bookmark”.
--------------------------
//Name: sCreateBookmark
//Description: Create Bookmark script
--------------------------
from Spotfire.Dxp.Application.AnalyticItems import BookmarkManager
from Spotfire.Dxp.Application import BookmarkComponentFlags
import clr
clr.AddReference("System.Windows.Forms")
from System.Windows.Forms import MessageBox
#Documentation on BookmarkComponentFlags
#https://docs.tibco.com/pub/doc_remote/spotfire/7.6.0/doc/api/
#html/T_Spotfire_Dxp_Application_BookmarkComponentFlags.htm

#Get the Bookmark Manager as a service
bookmarkManager = Application.GetService(BookmarkManager)
Document.Properties['vBookmarkCreated']=""
#Get the Bookmark name from the input field
vBookmarkName = Document.Properties['vCreateBookmarkName']
Document.Properties['vCreateBookmarkName']=""

if vBookmarkName <> '' and vBookmarkName <> ' '  :
#Create a new Bookmark:
 bookmarkManager.AddNew(vBookmarkName, BookmarkComponentFlags.FilterSettings |
BookmarkComponentFlags.Properties | BookmarkComponentFlags.MarkedRecords | BookmarkComponentFlags.ActivePage)
The bookmarkManager function in the above script contains the parameters to create a new bookmark in TIBCO Spotfire. The parameter “BookmarkComponentFlags” sets the bookmark settings which should be enabled/disabled. The member names, as described in the TIBCO documentation, are listed after each other and they are separated by the pipe symbol. Adjustments to these parameters can be made based upon your own expectations and your business needs.
Step 3: To provide information whether the bookmark has been successfully created, we have implemented a basic error-handling script. When the bookmark button has been clicked, it will verify if a bookmark name is given and then it will display a message in the label afterwards. The final result will look like this, a success message appears if a bookmark name is given. An error message will be shown and the bookmark won’t be created when the input field is empty.
The JavaScript will be executed simultaneously with the IronPython script from the moment that the “Create Bookmark” button is clicked.
------------------
// Name: jsBookmarkCreatedNotification
// Description: This script is used to show a notification when a new bookmark is created using the bookmark pop-up
------------------
$("#CreateBookmark").click(function(){
 //Get name of the created bookmark
 bookmarkName = document.getElementById('BookmarkName').firstChild.value;
 if( (bookmarkName =="") || (bookmarkName ==" " )){
  document.getElementById("BookmarkCreated").innerHTML = "<span class='error'>Please enter a name for the bookmark!</span>";
 } else {
  //Show text in label
  document.getElementById("BookmarkCreated").innerHTML = "<span class='succes'>The bookmark has been created with the given name: </span>"+ bookmarkName;
 }
});
Important remark: the JavaScript is referencing the span ID’s in the HTML Text Area instead of directly the Spotfire elements.
In our example, we are retrieving the value from the input box based upon the span ID “BookmarkName”. The span ID “BookmarkCreated” is a reference to the Spotfire label to display the message from the error-handling script.

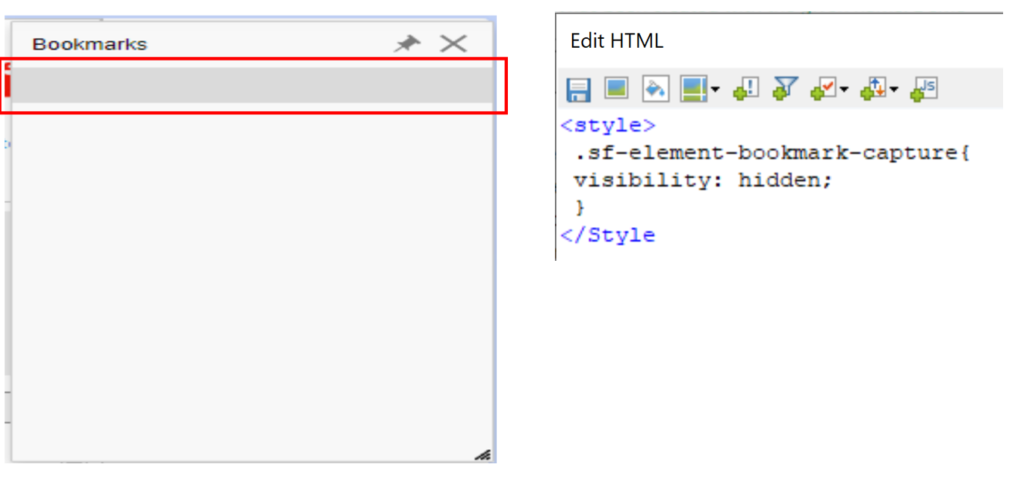
Step 4: Finally, we want to force our end users to the use the new implementation to create their bookmarks. If they would still use the old fashion way, it still goes wrong which causes the conflict as described above. Therefor, we will disable the input box from the bookmark popup menu with a CSS style element. The Spotfire element for the bookmark input box can be referenced by a CSS style and we will change the visibility to hidden for that element.
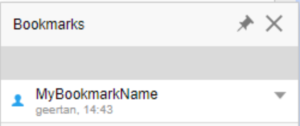
Step 5: Verify the workaround implementation. At first sight, you won’t see a difference in the bookmark popup menu when a new bookmark has been created.
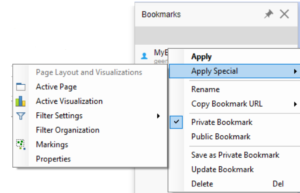
Therefore, the “Apply Special” on a bookmark name is the only option to verify the implementation. You will notice that only the bookmark settings, which have been addressed by the IronPython script, will be highlighted in the “Apply Special” section.
Summary
With our implementation, we’ve managed the constraint when the bookmarks are created in the TIBCO Spotfire Web Player. The workaround will provide you a solution to manage the different aspects of your bookmarks, whereby the analysis might be impacted by the standard bookmark approach in TIBCO Spotfire.